Thursday, December 29, 2011

Your transactional email data will now last longer


I've spent the last few days analyzing and re-tooling our algorithms which purge data from your account after its reached a certain age.  In the past, we've had some hard rules where data was deleted after it reached a certain age.  While this kept the size of our database manageable, it was frustrating to lower volume users who needed the data longer than we made it available.

We've now changed our data retention scheme such that the less data there is in your account, the longer it will last.  Specifically, the following rules for data retention will apply:
  1. Transactional Email Data: For users with more than 100,000 total transactional emails, this data will be available for 120 days.  For users with fewer than 100,000 transactional emails, this data will be retained indefinitely.  This includes the recipient address, from address, from name, subject, size, and other properties of transactional email but does NOT include the body of each transactional email.  We never store the content of individual transactional emails.  This also includes detailed open and click tracking data associated with transactional email.
  2. Transactional Email Opens: This data will remain as long as the corresponding transactional email record remains, per item #1 above.
  3. Transactional Email Clicks: This data will remain as long as the corresponding transactional email record remains, per item #1 above.
  4. Transactional Group Definitions: Transactional groups will remain for the life of your account.
  5. Unsubscribes, Bounces, and Complaints: This data remains indefinitely while your account is active.
We know that having access to historical data is important, as it allows our users to analyze data based on historical data.

We're always working on ways to improve our data storage and efficiency, and if you have any particular storage needs related to your account data, let us know, and we'll do our best to accommodate you individually.

Thursday, December 22, 2011

Our new commercial! Your email's superhero.

Who wouldn't want their own personal superhero? Now your email has one!

With JangoSMTP, your transactional email has backup: a host of deliverability optimization tools and support that, quite literally, kicks ass. If email gets off track, it's JangoSMTP to the rescue.


JangoSMTP: Your email's superhero.

Tuesday, November 29, 2011

How to track transactional emails all the way through using the SMTP relay

There may be cases where, using the SMTP relay, you want to programatically track the status of every transactional email sent.  At first thought, this seems difficult, since when sending via the SMTP relay, you can't retrieve an ID for each email like you can by calling the API method SendTransactionalEmail, which does return a unique ID for each email sent.

To get around this, you can insert a custom unique ID header into your SMTP relay messages, and use that custom unique ID to track your transactional emails all the way through.

For example, let's say you insert the header X-MyCustomID into every email you send via the SMTP server.  And for each email, you use a different value for X-MyCustomID.  Your first ten transactional emails would have these headers:

X-MyCustomID: 1

X-MyCustomID: 2

X-MyCustomID: 3


...and so on.

Step 1:

Tell JangoSMTP what the header is that is storing your custom ID.  Do this under Settings --> Tracking --> General:


Step 2:

Send your emails via the relay inserting the header into every email you send, and in your own system, keep track of all custom IDs used.

Step 3:

Call this API method with each custom ID.  This method will allow you to retrieve the JangoSMTP assigned ID based on your own custom ID.


  • GetTransactionalIDsFromCustomID
    Retrieves the system transactional ID given a user-specified custom ID for a transactional email. Returns an XML Document.


  • Once you have the JangoSMTP assigned ID, you can call any number of methods to get the status of your transactional email, such as:


  • Reports_Transactional_GetSingleEmailStats_Dataset
    Retrieves statistics for a transactional email. Returns a .NET DataSet.


  • Reports_Transactional_GetSingleEmailStats_String
    Retrieves statistics for a transactional email. Returns a string.


  • Reports_Transactional_GetSingleEmailStats_XML
    Retrieves statistics for a transactional email. Returns an XML document.


  • Tuesday, November 22, 2011

    Why URL shorteners and email don't mix

    As you may know, a URL shortener is a service that allows you to input a long URL, and receive a much more concise address. This shortened version redirects the user to the intended location. There are two main benefits of these services:

    1. The shortened address can be more easily shared with others. This is especially helpful for mobile text messaging.

    2. Many allow you to track statistics on the number of visitors to that address.

    A few examples of commonly used URL shorteners are tinyurl.com, bit.ly, Google's goo.gl, and Twitter's t.co.

    Here's the big problem with using these in your emails:

    Spammers use them too!

    They are attractive to spammers because the address of the true destination page is masked by the shortener.

    When you send an email, the receiving server scans the message to try to determine whether or not it is spam. One item that is commonly checked is any URLs within your message. Therefore, because spammers have damaged the reputation of these URL shortener domains, including them in your emails can hurt your deliverability.

    The good news is that it's easy to avoid having to use URL shorteners in your emails. If the full URL is unsightly due to its length, send your emails in HTML format and hyperlink the full URL with some short descriptive text. If you require statistics on visitors to your links, JangoSMTP includes a click tracking feature that can be branded with your own domain name.

    Wednesday, November 9, 2011

    Tour the New User Interface

    Last week we announced the launch of our new UI for JangoSMTP users. Today, we’d like to show you around.

    First, let’s take a look at navigation. We’ve redesigned and reorganized the interface to make it faster and more intuitive to get things done. Here's the old Welcome Page:

    Here's the new Dashboard:

    The Reports section is also a lot sleeker now. We know how important good reporting is to the success of your campaigns, so we worked hard to take user feedback into account to better organize your reports. Take a look. Here's the old Reports Dashboard:

    Here's the Reports Dashboard in the new UI:

    Take a look at some of the detailed Reports you'll see in the new UI:
    Transactional Reporting
    Address Changes Report in Management Reporting
    Complaint Rate Report in Management Reporting
    In addition to being more aesthetically pleasing, Settings has been streamlined so that you can configure your account more easily, and we’ve improved our contextual help so that even new SMTP users can feel comfortable getting under the hood:

    We’ve also built a number of tools into the new UI that we think you’ll like. We’ve made it easier to access deliverability tools like the Delivery Health Check and Delivery Optimizer and also created new features like the ability to easily upload assets to our server. Here are some of the tools you’ll see in the new UI:

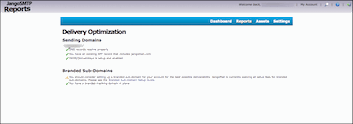
    The delivery optimization tool
    The delivery health check tool
    The new assets management tool
    We’ve even made it easier to manage your account, monitor your use, and keep your contact and billing information up to date.


    These are just some of the changes you’ll see in the redesigned JangoSMTP. After a year in the works, we’re excited about the new UI and hope you are too. If you have any feedback or questions, please don’t hesitate to contact us.

    A sleeker user interface for JangoSMTP

    After almost 13 months of development, we've launched a new user interface (UI) for JangoSMTP, our flagship SMTP server and transactional email service. The new interface is cleaner, more intuitive, and more aesthetically pleasing than our old interface. Additionally, there are some new features that were previously unavailable, like the ability to upload assets (images, documents, and other files) to our server.

    Currently the new interface is in place for all accounts created since October 1, 2011, and will be in effect for all accounts created going forward. In a week or so, after we've confirmed that we haven't sunk the ship, we'll launch it for everyone. If you'd like to upgrade to the new UI before then you have two choices:

    1. Login as normal, and click the "New UI" link in the upper-right corner. If you want to switch back to the old UI, then manually go to https://www.jangosmtp.com/application2/Welcome.asp
    2. Contact us and we can switch your account to permanently use the new UI.

    We'll soon be publishing a detailed blog post on the new interface, but for now, here are a few screenshots.

    The Dashboard

    Authentication Settings

    Transactional Email Reports


    Monday, November 7, 2011

    New Feature: API methods to add/delete authenticated IP addresses to SMTP relay

    JangoSMTP's SMTP service is now authenticating connections from over 7,000 IP addresses around the world. A future blog post will geo-locate the IP addresses so you can see from where around the world our customers are relaying email.

    In celebration of this milestone, we've launched two new API methods that allow for the addition and deletion of authenticated IP addresses into a JangoSMTP account.


    Monday, September 26, 2011

    The importance of setting up a custom tracking domain

    Setting up a custom tracking domain is one of the easiest ways to improve your email deliverability.

    What is a tracking domain?

    A tracking domain is the domain used in various tracking mechanisms, such as the open-tracking, click-tracking and forward-to-friend tracking. It is present throughout the HTML portion of your email campaign. Without a custom tracking domain, a system default domain is used, like x.jango5.com. If you setup a custom tracking domain, based on your organization's domain, then the domain might look like x.mycompany.com.

    Why is setting up a custom tracking domain important?

    It allows your domain to establish its own reputation with email receivers, not clouded by other JangoSMTP users. By setting up your own, you can isolate yourself from the activities of our other clients and ensure higher deliverability. Additionally, your emails will be further branded around your own organization, not the email service provider.

    How do you setup a custom tracking domain?

    First, choose the domain you'd like to use for your tracking domain. If your domain is browniekitchen.com, then setting up x.browniekitchen.com makes for the perfect tracking domain.

    Secondly, an entry needs to made in your DNS (Domain Name Server) system. You can do this yourself if you have access, or you may need to contact the technical person who manages your domain. You need to modify your DNS settings such that you create a CNAME record for your chosen domain to alias to jngo.net. Detailed instructions are also on the Settings/Tracking Domain page under About Tracking Domain. Lastly, enter your tracking domain in JangoSMTP by going to Settings --> Tracking --> Tracking Domain.


    After completing this final step, you will notice that your custom tracking domain will now appear in the URL for click-tracked links, in the open-tracking pixel reference, and in other places throughout your HTML email campaigns.

    Other deliverability optimization steps

    Setting up a custom tracking domain is just one of many measures you can implement to optimize your email deliverability. To read about other steps, see the blog post entitled: Optimizing deliverability with JangoSMTP

    Tuesday, July 19, 2011

    The geek gets the girl in the latest JangoSMTP YouTube commercial!

    Are you serving your customers well?

    The online world can't tell if your customers are a "Big Deal" or not, so make sure they all get first class treatment with JangoSMTP.

    Check out our latest video here.


    JangoSMTP: Email. Track. Confirm!

    Wednesday, June 29, 2011

    Configuring Eudora to send using your JangoSMTP account

    Recently, we've had several customers contact us asking how to configure JangoSMTP with Eudora 7, so we decided we'd share it on our blog. Configuring an SMTP server with Eudora isn't quite as straightforward as you might expect with an email client, but we'll walk you through the steps necessary to get it working properly.

    This guide was created using Eudora 7.1.0.9 and assumes that you've already set up an incoming mail server with your Dominant personality. This guide will cover how to set up an additional personality for sending emails through the JangoSMTP relay.

    Getting started with Eudora 7 and JangoSMTP
    1. In Eudora, select the 'Personalities' option from the 'Tools' menu. On the left side of the screen, you should see a list of your current personalities.
    2. Right-click in the 'Personalities' box and click 'New'.
    3. On the 'New Account Wizard' screen, select the 'Skip directly to advanced account setup' option and click the 'Finish' button.
    4. Enter the settings for your account as follows:

    5. Switch to the 'Incoming Mail' tab, and enter relay.jangosmtp.net in the 'Server' field. We don't provide an incoming mail relay, but this setting is required to use an external SMTP relay with Eudora.

    6. Click the 'OK' button.
    7. Send a test message through Eudora, making sure to select the personality you set up your JangoSMTP relay with as the 'From' address.
    Setting the JangoSMTP-configured personality for use with any personality
    Once you have set up a personality in Eudora that uses the JangoSMTP relay, you can set it to be the default personality to use for all outgoing messages.
    1. Select the 'Options' option from the 'Tools' menu.
    2. Click on the 'Sending Mail' option from the 'Category' menu.
    3. Configure your settings as shown:

    4. Click 'OK'.
    5. Now all of the messages you send from Eudora will use the personality you selected.
    Changing your outgoing SMTP port in Eudora
    Many ISP's block port 25, which is the default SMTP server port that Eudora uses. If you try to send a message and receive the following error:
    Could not connect to 'relay.jangosmtp.net' Cause: connection timed out (10060)
    It may be the case that port 25 is blocked on the network you're using. To resolve this, you can change the SMTP port that Eudora uses:

    Using Windows:
    1. Close Eudora if it is currently running.
    2. Navigate to the folder where Eudora is installed (by default, this will be 'C:\Program Files\Qualcomm\Eudora\').
    3. Open the 'extrastuff' folder.
    4. Inside this folder, you should see a file name 'esoteric.epi'. Copy this file into the main Eudora folder.
    5. Start Eudora again.
    6. Select the 'Options' option from the 'Tools' menu.
    7. Click on the 'Ports' option from the 'Category' menu. You will see this:

    8. Change the port listed in 'SMTP Port (25)' to one of the other ports we make available (we accept connections on ports 25, 2525, 465, and 587 - we recommend starting with 2525).
    9. Click the 'OK' button and try sending again.
    And that's it! You should now be able to relay email through JangoSMTP using Eudora. If you have any problems at all, please contact our support team and we'll be glad to help!